First gather your supplies:
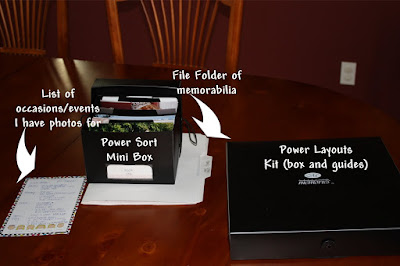
Ok, first, clear off your dining room table! Then gather your supplies. I use Creative Memories Power Layouts Kit because it has reusable plastic guides - you could also use cardboard inserts or your actual scrapbook pages if you like, but I prefer the plastic ones.
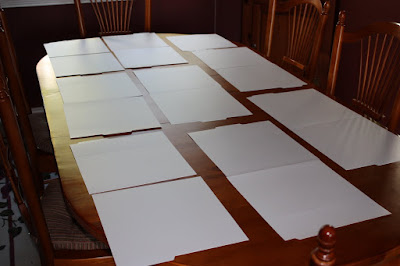
Lay the guides out on a large table or floor:
.jpg)
From left to right...the very first guide is all by itself because this will be my Title Page. All the other guides are set down in pairs so you can easily see a double-page spread or how it would look if you were holding the album in your lap like a book.
Next, you start tossing your photos onto the guides either in chronological order or by theme:
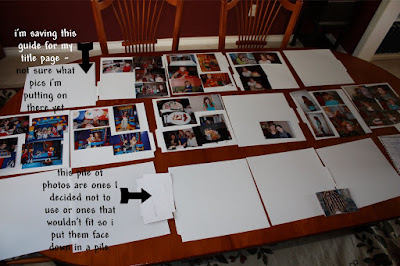
pretty soon your pages (guides) start to take shape and you can clearly see what photos you want for a one-page spread and which will take an entire two-page spread or more. Remember to add any memorabilia you want with your photos in this step:
If you have a LOT of pictures like I did with doing almost all of 2009 at one shot, you may want to get more guides (the Kit only comes with 15...I use at least 45!), spread out to the floor and keep going!
and if you are really crazy-behind like me, you won't stop here....now I put new guides on top of all of these guides and keep going! But seriously, if you are out of photos, stop.
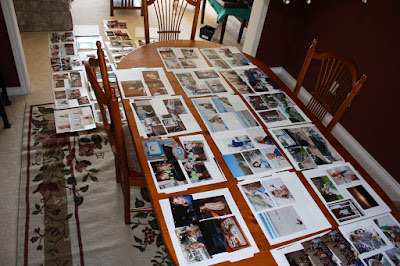
Here is my double-layer ...now I'm continuing laying out photos like a mad-woman.
(rev+0).jpg)
but look what obsessive-compulsive disorder can do! Haha! Two layers of our entire 2009 family album layed out in just a wee bit of time. Total of 64 pages!!
But I need to stop now and take a break (my little Prince needs to eat). This is very important: starting backwards (with your very last page you laid out), start stacking the guides. Last guide will be on the bottom of your pile!!! Sooo start with the last page and continue stacking all of the guides in backwards order so you will end up with the first page on top!! Got it? Good!
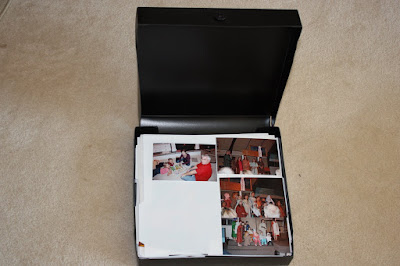(rev+0).jpg)
This is where you are really going to want the Power Layouts Kit because it comes with this very cool box. And the best part is:
It seals shut!
Stay tuned for Step Two in Power Layouts where we will crop our photos (if needed) and add enhancements (pretty paper, etc). all of this will be transfered into a real album on real pages, it will all make sense. It is the fastest way I know and I have completed many, many albums in just a few evenings using this system! I hope you can too!
(rev+0).jpg)
(rev+0).jpg)
(rev+0).jpg)
(rev+0).jpg)
Hey I love your power layout idea. Heard about it years ago and never new exactly what you did. I'll be coming back to learn more. Thanks.
ReplyDeleteHi Donna Lyn!! It was so fun to 'see' you on my blog! When I peeked at yours I immediately emailed my Mom (valkenwill above...LOL) and told her about it! We both learned about this awesome way to be organized but never did try it. This has totally inspired us both. Thanks so much!
ReplyDeletethank you Julie! i hope you come back often. you are an inspiration to me so it means a lot that i could pay ya back a bit in the inspiration dept! happy scrappin, :DL
ReplyDeleteLove the visual. Can't believe I couldn't find a youtube video to show me how, so I'm glad I found you.
ReplyDelete